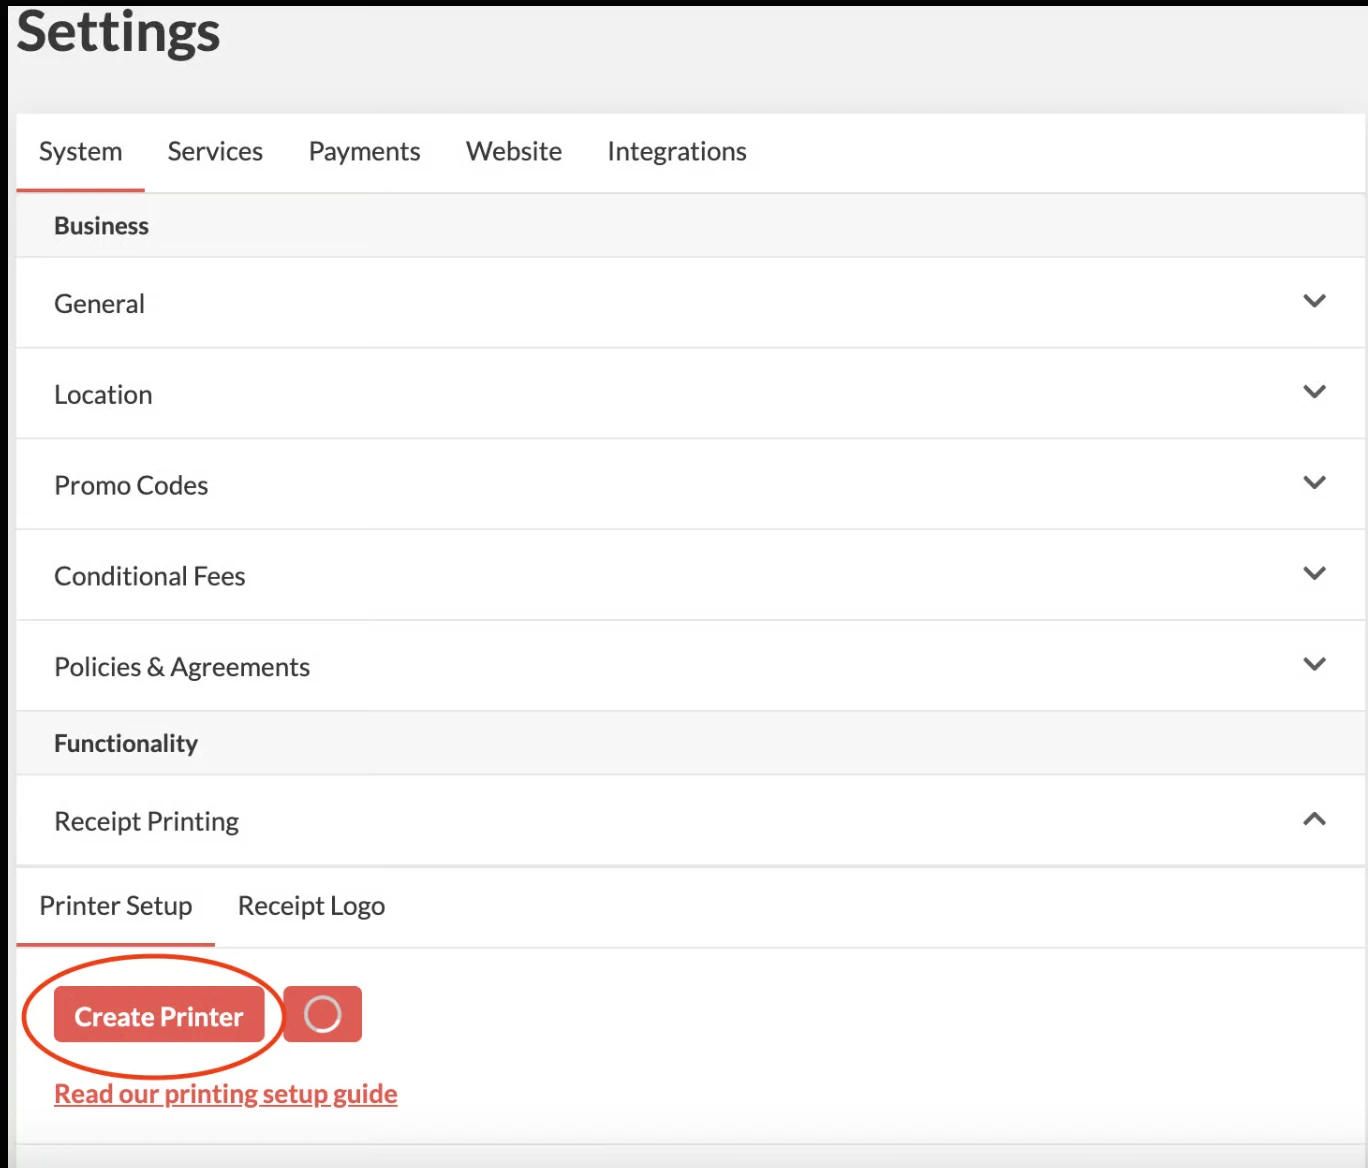
Go to Settings > Receipt Printing > Create Printer.
Fill in:
Printer Name - i.e. "Android Kitchen Printer"
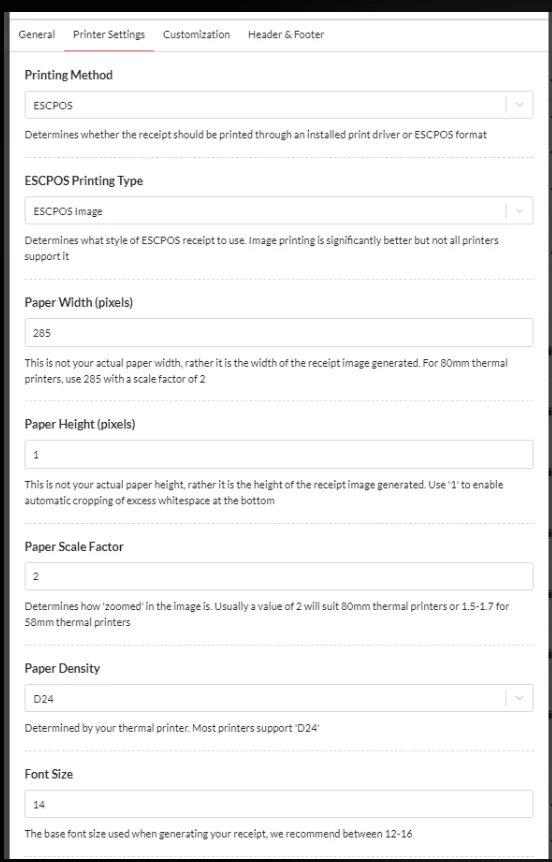
Printing Method: Set to ESCPOS
Printing Type: Use ESCPOS Image for best results. (Note that some older printers may not support this method and ESCPOS Text Only can be used in these cases).
Paper Scale Factor: Adjust to 1.7 if text is cut off.
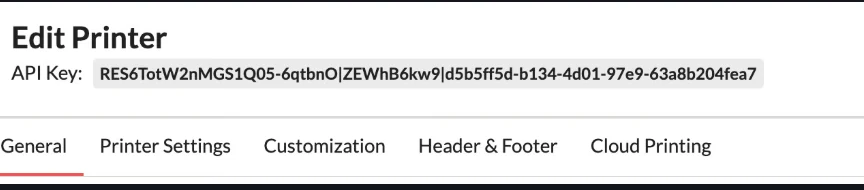
Click "Save" and copy your unique API key (needed later).
Step 2: Install PushPrinter on Android
Download PushPrinter from the Google Play Store.
Open the app after installation.
Press the settings icon ⚙️, then select Default.
Step 3: Add and Configure a Printer on Android
Tap "+" (Add Printer) to configure a printing service.
Select Bluetooth or Network (for IP Printer):
If using Bluetooth, the app will automatically scan for available printers.
Ensure your printer is powered on and in pairing mode.
Select your printer from the list.
Enter the API Key from your Localforyoucarts dashboard. The API key can be found on the restaurant's printer settings. (Settings > Receipt Printing)
If prompted, enter the default printer PIN (0000 or 1234).
Confirm that the printer status is "Connected" in your Localforyoucarts dashboard.
Once all the details are filled out, check the status of the printer on your restaurant’s settings. Make sure it appears as connected.
Click "Test Print" if setting up is successful, it will do a test print